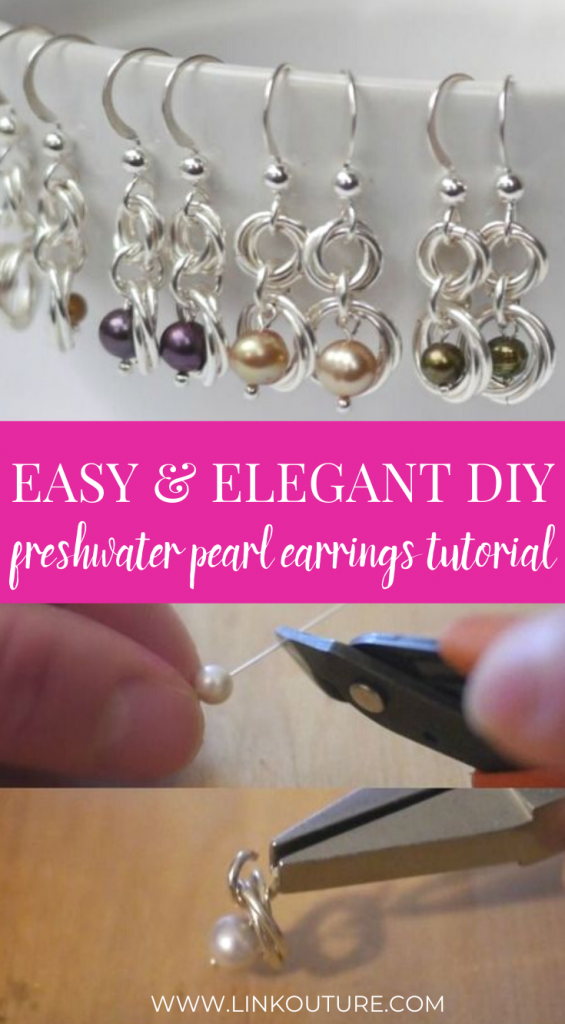
Learn how to make pearl earrings that look super complicated and fancy but actually whip up super fast.
Back when I had my jewelry business, I would easily crank out about 15 pairs of these elegant DIY freshwater pearl earrings in an hour during my busy season. (But don’t be alarmed if it takes you more than four minutes. When I first started making these it would take me about 15 minutes a pair.)

(Which, by the way, is faaaaaaaar less time than it takes to actually put this tutorial together. That actually takes me hours — so you’re welcome!)
The take about the same amount of time to make as the matching DIY single pearl necklace.
By the way, for your convenience, I have included affiliate links. You can read my full disclosure here.
For the longest time, these were my bread-and-butter jewelry. I always had a stand full of them at my shows and they were always one of my best sellers, if not the best seller. It still makes me smile when I see someone I know wearing a pair of them.
You can make these earrings in a rainbow of colors, or substitute the pearls for your favorite type of gem or eco-friendly bead. (Just make sure whatever bead you use it’s on the smaller side, as these spirals are quite small themselves!)

How to make pearl earrings at home
In this tutorial, you’ll learn:
- How to string a freshwater pearl on a headpin
- How to make a wire loop
- How to connect everything using jump rings
Before we jump into this pearl earring DIY, here are a few notes:
- I HIGHLY recommend these flat nose pliers for any of my jewelry tutorials. Keep in mind you will need two pairs of these pliers. Yes, they are pricey, but they are WORTH the investment if you plan on making a lot of jewelry. They are hands down the best jewelry tool I have ever purchased.

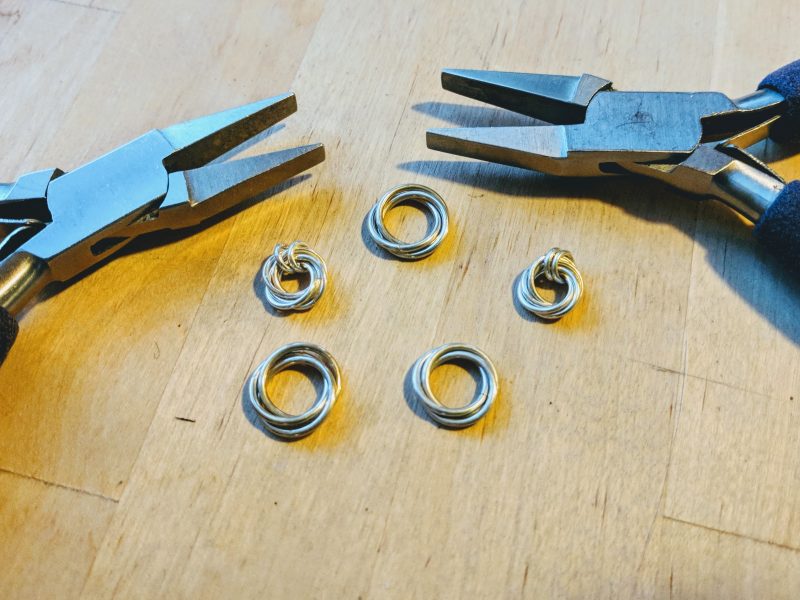
- The main feature of this tutorial is a 3-ring mobius spiral. Unsure how to make one? You can learn how in my free mini video course.
- This tutorial assumes some basic jewelry-making skills, including creating a simple eye loop above a pin. This tutorial includes some images below, but if you’d like videos demonstrating how to do all of the skills needed for this tutorial, my paid course, Metal to Masterpiece, covers EVERYTHING you’ll need to make this and most of my other jewelry-making tutorials.
- Want to make your own fish hook ear wires used in this tutorial? Check out this video tutorial that teaches you how!
How to make your own elegant freshwater pearl earrings

These earrings look super complicated and fancy but actually whip up super fast.
Materials
Jump Rings
- 6 large open jump rings (I use 7.0 mm inner diameter sterling silver rings)
- 6 smaller open jump rings (I use 4.5 mm inner diameter sterling silver rings)
- 2 small open jump rings (I use 3.5 mm inner diameter sterling silver rings)
Other materials
- Fish hook ear wires
- 2 small round freshwater pearls (I recommend about 5-6mm round pearls)
- 2 ball head pins
Tools
Instructions
- Make four sets of mobius spirals: 2 sets with the 7.0 jump rings and two sets with the 4.5 jump rings.
- String one of the freshwater pearls onto the headpin.
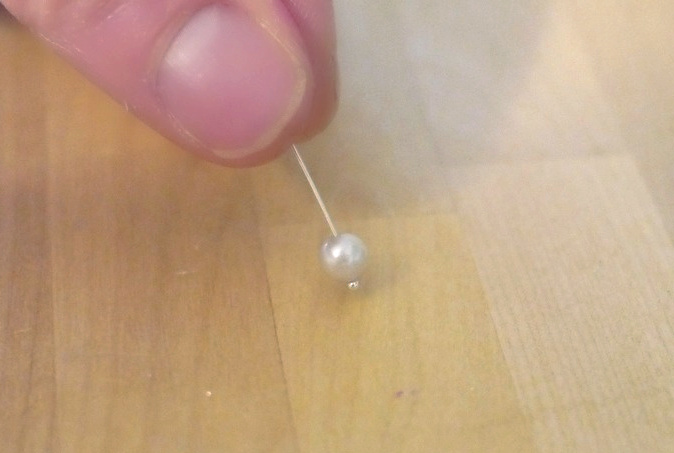
- Trim off the ends so that there is about 1 cm of pin sticking out above the pearl.
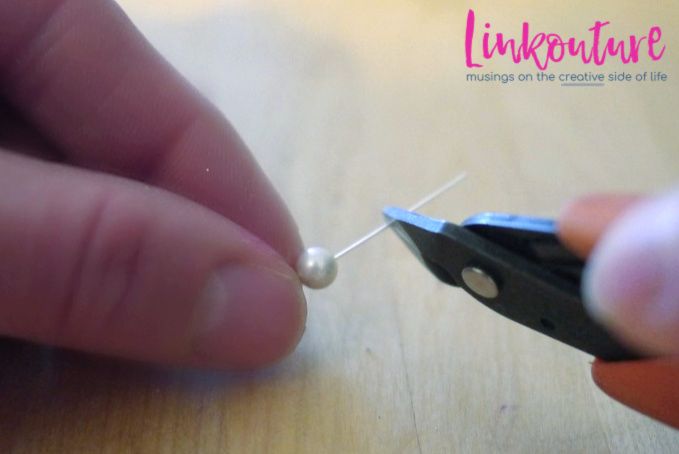
- Bend the pin at about a 90-degree angle.
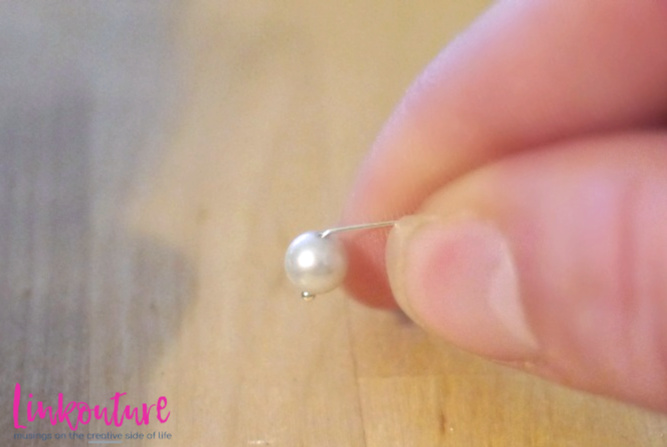
- Wrap the hand pin around one nose of the round-nose pliers OR step pliers to form a loop above the bead.

- Take one of the 3.5 mm jump rings and loop it through the large spiral and through the headpin you just made.
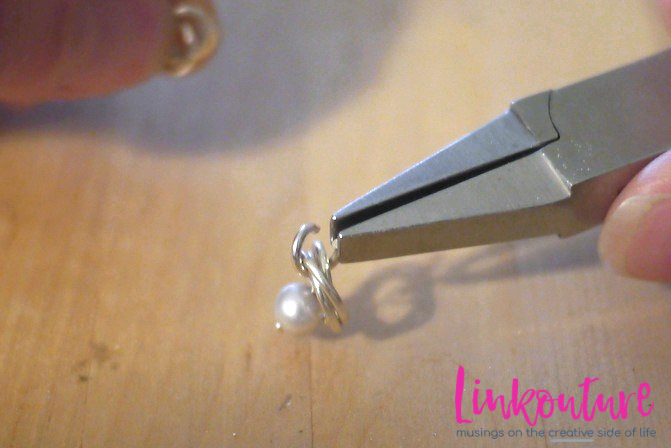
- Carefully add on the smaller mobius spiral, and gently close up the jump ring holding them together until they make a nice click.


- Add on the ear wire and adjust the earrings if need be so that the pearl is in the front. Repeat with the other parts and tada — your own elegant freshwater pearl earrings!
Notes
- In my FREE mini video course, Jump Ring Jewels, you'll learn the right way to open and close a jump ring and how to make a Mobius spiral. Click here register or go to www.linkouture.com/jewelry-making-basics.
- This tutorial assumes some basic jewelry-making skills, but if you'd like a video tutorial of this and all of the other skills used in this tutorial, I recommend you register for my paid course, Metal to Masterpiece. Click here to register or go to www.linkouture.com/fundamentals
- Want to make your own fish hook earrings? I have a video tutorial that teaches you how to make them! Click here to purchase the tutorial or visit my course shop at linkouture.thinkific.com.
Recommended Products
As an Amazon Associate and member of other affiliate programs, I earn from qualifying purchases.


DID YOU FIND THe tutorial for these DIY pearl earrings helpful? CONSIDER LEAVING A TIP!
Leave a tip here if you’d like. They are not necessary, but always appreciated 
Jewelry making inspiration delivered right to your inbox
Sign up for the Linkouture newsletter to receive ideas, tutorials, and practical steps for jewelry making e-mailed to you. You’ll also get exclusive access to my FREE mini video course, Jump Ring Jewels.
You are signing up to receive promotional and marketing materials from Linkouture. You may unsubscribe at any time. Check out Linkouture’s privacy policy for details.
More jewelry making tutorials you’ll love!
- Freshwater pearl necklace — This necklace coordinates perfectly with the earrings in this tutorials
- Spiral chain bracelet — This chic bracelet looks really complicated but is basically just a bunch of spirals strung together.
- Fish hook ear wires — Create your own fish hook ear wires like the ones in this tutorial
Enjoyed this tutorial? Pin it for later!
Your shares are how this site grows and I am sincerely grateful. Know a friend who’d like this? Please share it on Facebook or save it to your favorite jewelry-making DIY ideas board on Pinterest.