Learn how to make a chain lariat necklace with just a few jewelry making SUPPLIES.
Once upon a time, I was involved in an organization for young professionals. There were several interest groups, from the neighborhood in which you lived to people who worked in specific fields to a bookclub.
I, of course, ran the craft group.
About once a month we’d meet up to do try a different project.
From card decorating to making clay figurines, we were on a mission to try our hands at different mediums and bond over our love of crafting.
One month we went to this fantastic jewelry-making studio in the neighborhood that has sadly since gone out of business. It was my go-to place to learn new skills — these were the days before Pinterest, and YouTube was in its infancy stage.
On this particular Craft Club meet up we were learning how to make lariat necklaces, and I absolutely fell in love.
For your convenience, this post contains affiliate links. You can read my full disclosure here.
With just a length of chain and a few beads, you can put together a stunning handmade necklace.
You’ll be amazed at how quickly you can put together a beautiful necklace for yourself or to give as a gift.
Making a lariat necklace
One of my favorite things about lariat necklaces is there are so many variations — and lots of ways to wear them! — and none of them take very long to make.

You can easily customize this chain lariat necklace, using multiple beads on the end instead of one or creating a large loop out of wire instead of the hoop.
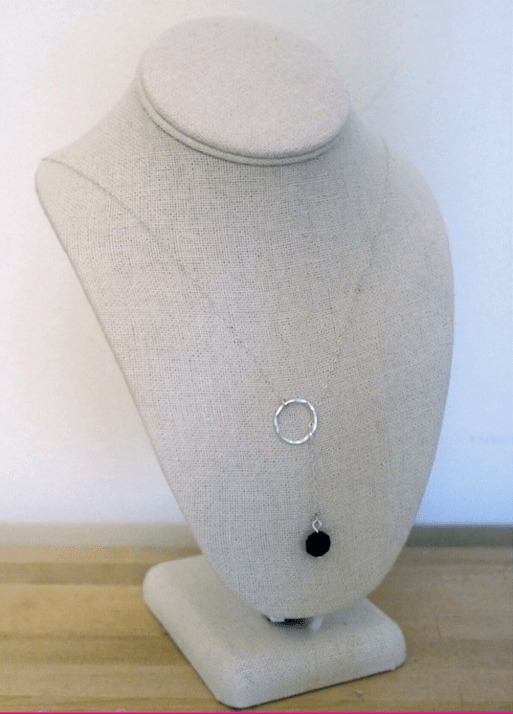
For this particular necklace, you will use a large closed ring and a bead that strings through the ring.

It’s important that the ring is big enough for the bead to fit through it. I recommend choosing a ring that’s only a little bit bigger than your bead.

DIY Lariat Necklace

Learn how to make a chain lariat necklace with just a few supplies and materials. You’ll be amazed at how quickly you can put together a beautiful necklace for yourself or to give as a gift!
Materials
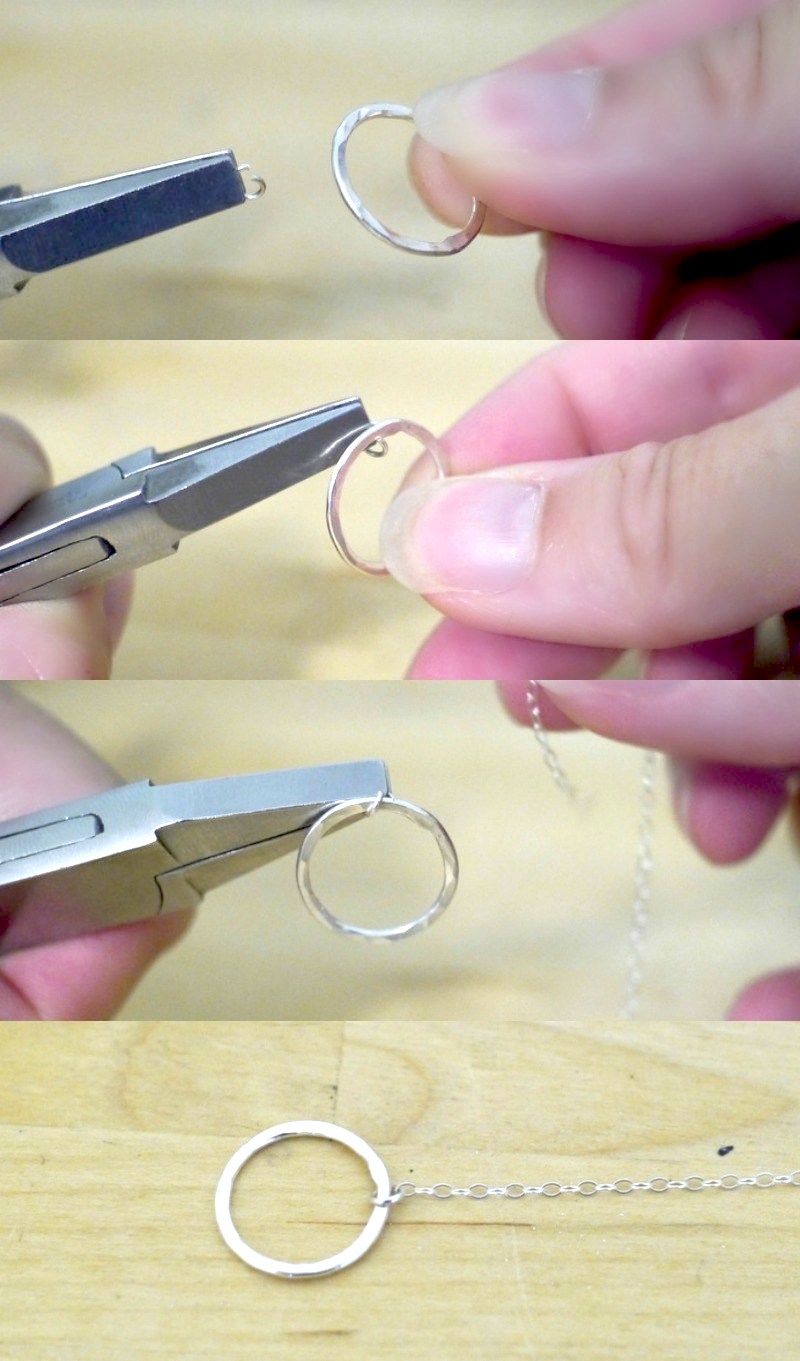
- 2 tiny jump rings (I use 22 gauge 2.2 mm ID sterling silver jump rings)
- 1 Ball headpin
- At least 20 inches of chain. You want to make sure it’s long enough to go around your necklace and have the bead hang down. You can always cut the chain down shorter if you decide it’s too long. I prefer using flat cable chain.
- Large bead
- Large closed ring that is bigger than the bead
Tools
Instructions
- Take one of the tiny jump rings and string it through the large closed ring. Attach one end of the chain to the jump ring. Close the jump ring snugly using the flat-nosed pliers.
- Put the head pin through the bead and create an eye loop at the top. Check out the instructions in this tutorial for reference or see the video below .
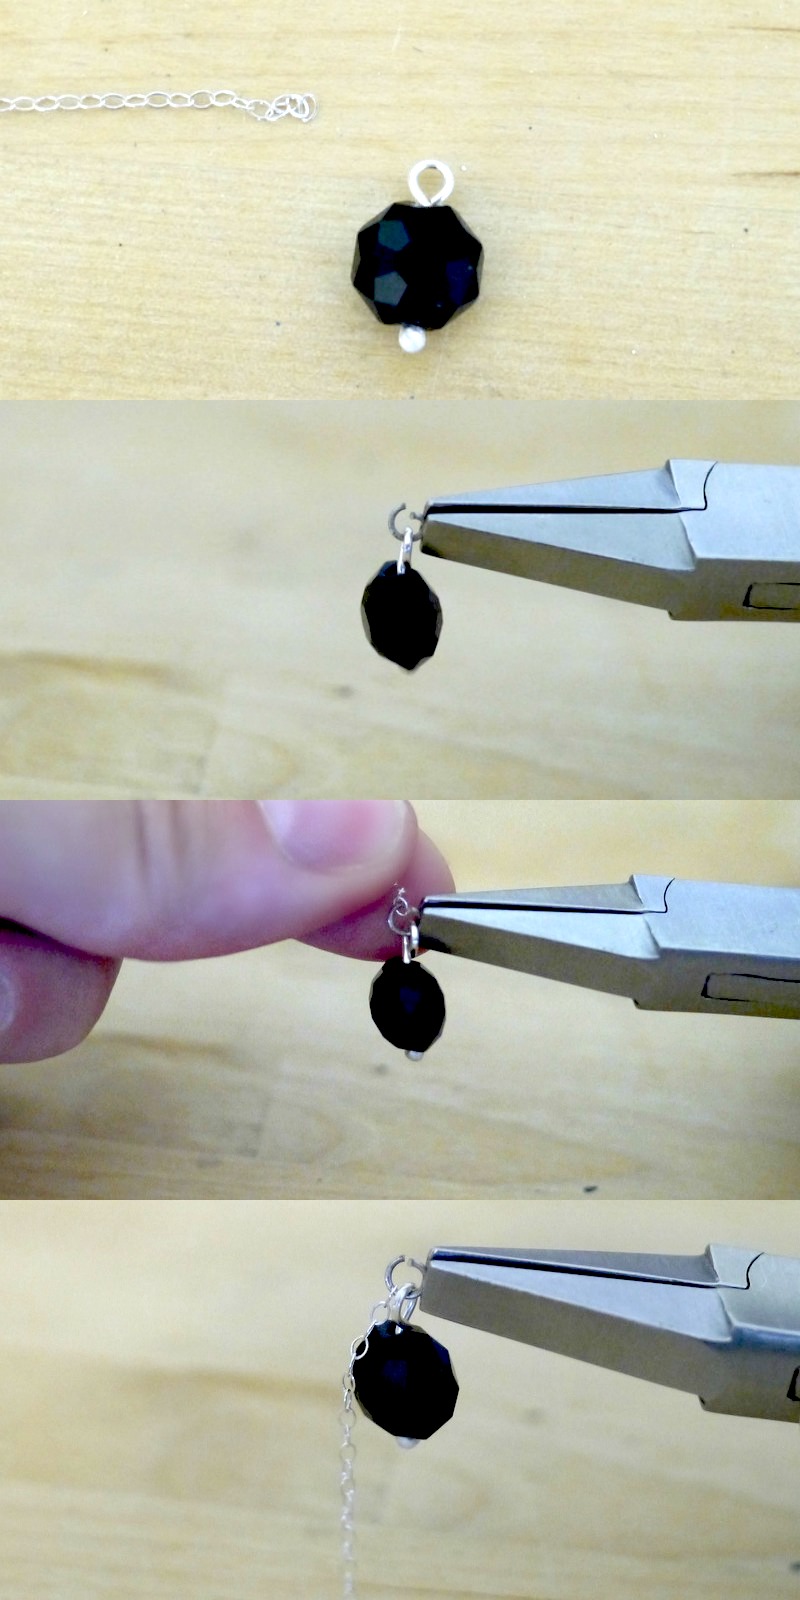
- Next, it’s time to add the bead to the chain. Open the tiny jump ring and string it through the eye loop that you just created. String the jump ring through the other end of the chain and close it up tight with the pliers and you're done!
Notes
To wear the necklace, take the two ends of the necklace around your necklace and string the bead through the large ring. 
Recommended Products
As an Amazon Associate and member of other affiliate programs, I earn from qualifying purchases.


IF YOU FOUND THIS lariat necklace DIY HELPFUL, CONSIDER LEAVING A TIP!
Leave a here tip if you’d like. They’re not required, but always appreciated 
Jewelry making inspiration delivered right to your inbox
Sign up for the Linkouture newsletter to receive ideas, tutorials, and practical steps for jewelry making e-mailed to you. You’ll also get exclusive access to my FREE mini video course, Jump Ring Jewels.
You are signing up to receive promotional and marketing materials from Linkouture. You may unsubscribe at any time. Check out Linkouture’s privacy policy for details.
Like this jewelry tutorial? Pin it for later!
Thank you for helping to share the love! Your shares are how this site grows. Know a friend who’d like this? Please share it on Facebook or save it to your favorite jewelry-making DIY ideas board on Pinterest.
